Generate a Dynamic Report without the VeraCore user interface. Use the Dynamic Reporting API to generate any dynamic report in your OMS, WMS, or PMA system.
You can use it to send data to third party applications, your clients, or other vendors and partners.
The Dynamic Reporting API article explains the API itself, including a detailed breakdown of all seven operations. The purpose of this article is to demonstrate how to test the API in Swagger.
What is Swagger?
Swagger is an API documentation tool that provides a user interface to allow users to try out API calls directly in a browser.
Use swagger to see the fully formed json requests and responses.
Accessing Swagger for the VeraCore Public API
You can access the swagger user interface by opening a browser and going to:
https://(YourDomain_or_Rhu#)/veracore/public.api/swagger/ui/index
Using Swagger to Try the Dynamic Reporting API
Before you can begin using the Dynamic Reporting API, you must have at least one dynamic report available in your system (every system comes with several VeraCore-provided reports you can use if you aren't ready to create one yourself) and a
web service user tied to that database with the appropriate access level.
In this article, we will follow the VeraCore provided Dynamic Report "Order History (Summary Orders Captured)".
Our web service user has already been defined in PMA and has an access level that allows them access to this report.
Our process will perform the following operations in the following sequence:
Getting Started
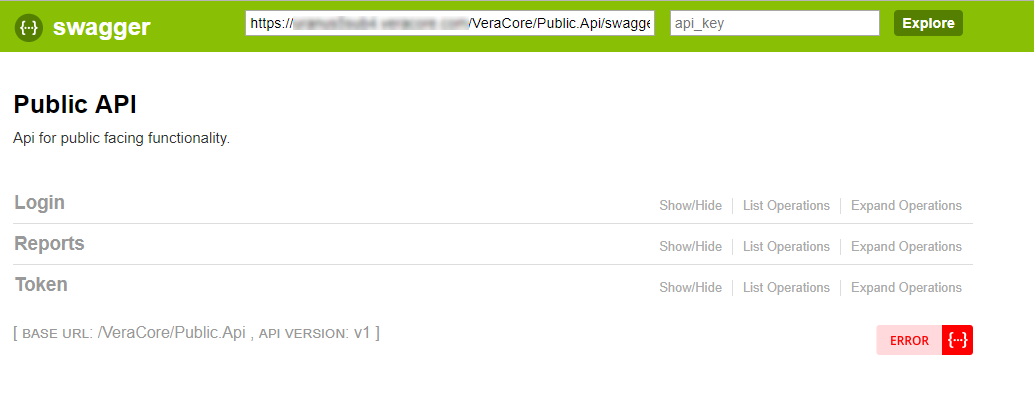
Open a browser and go to https://(YourDomain_or_Rhu#)/veracore/public.api/swagger/ui/index
The home page of VeraCore's public API in the swagger ui displays.
POST Login
The first operation will create a token to use instead of the web service user's credentials from the PMA system. To create the token, you'll need the web service user's username, password, and associated system ID. Services must be running in that system (i.e., the Disable Services box must be un-checked in the Create/Edit Databases screen.)
- Click Login to expand it and list the operations.
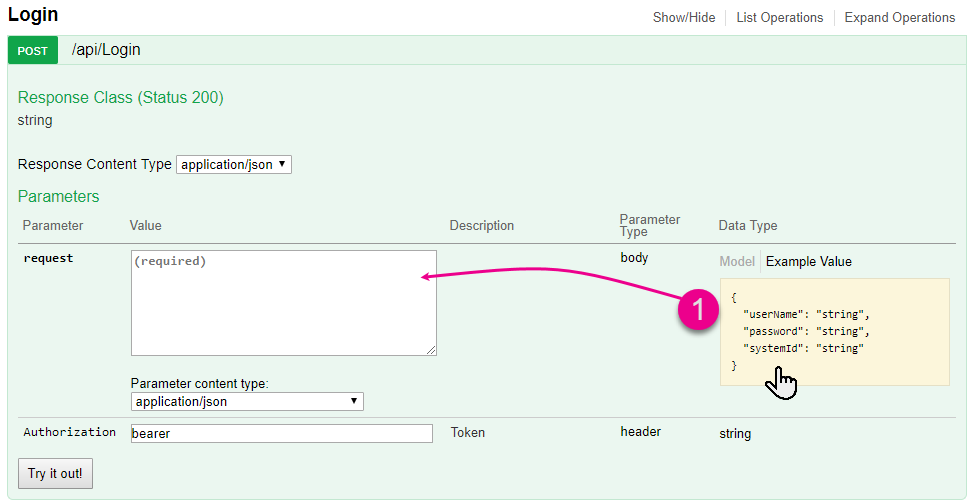
- Click /api//Login beside the POST login operation. The operation expands.

Note the screen below. The request box is where you'll form the request. It is blank.
- Click the yellow "Example Value" box to copy the text from that box into the white Request box. This provides you with a properly formatted request.
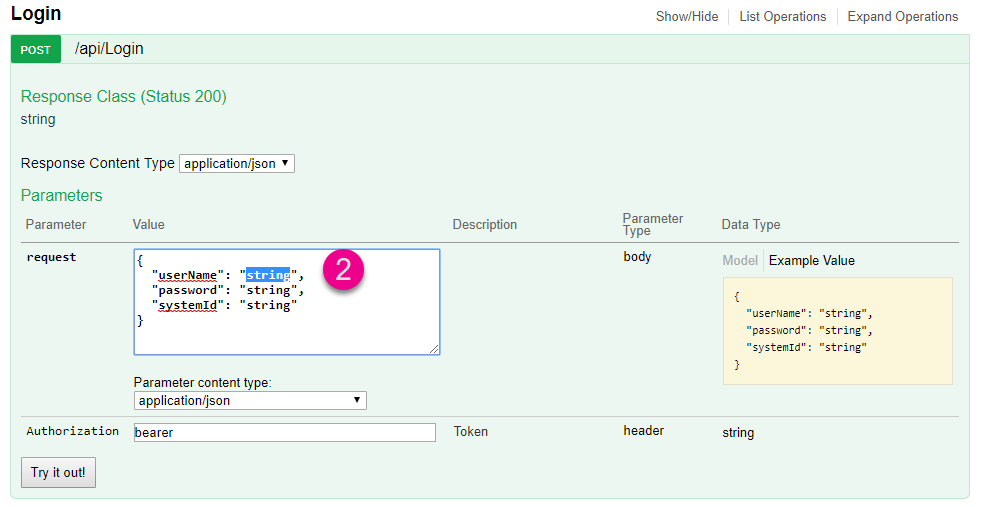
- In the request box, highlight the 'string' text beside each parameter and overwrite with the appropriate values. In this example, you're using the Web Service User credentials to get a security token. So, you'll replace the 'String' text with the web service user's username, password, and VeraCore system to which they belong.
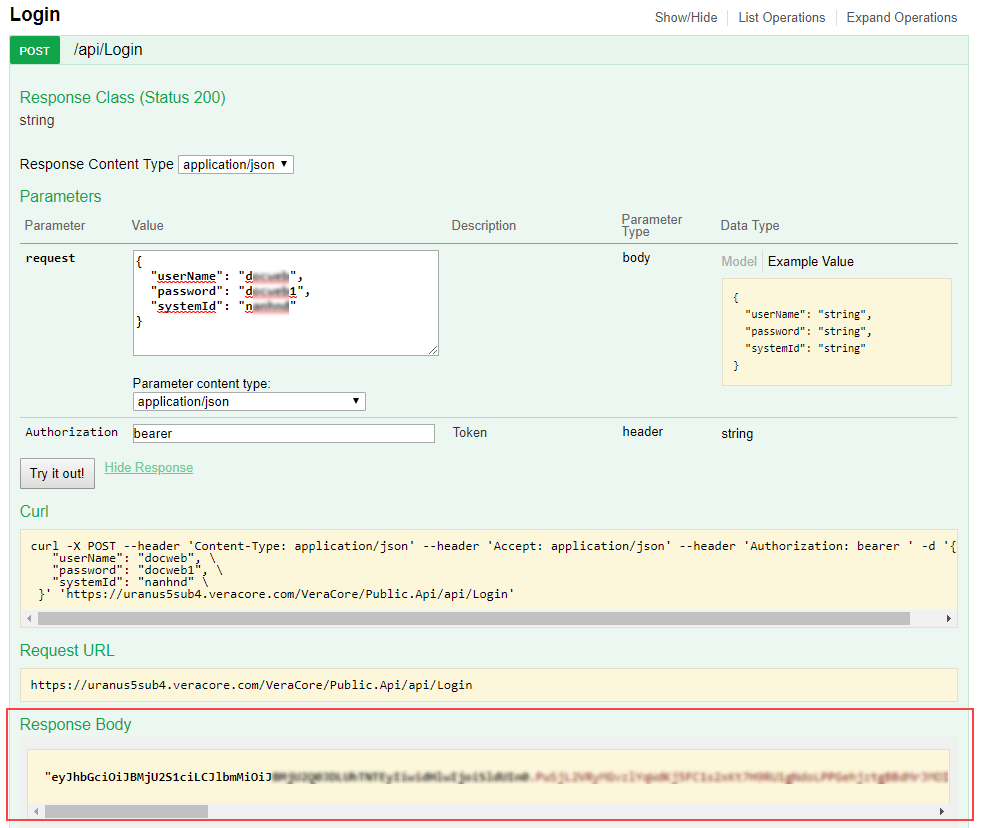
- When your request has been filled out, click the Try it Now! button at the bottom left corner of the screen.
- The operation runs.
- In the Response Body below, the Token has been returned. This token will act as your credentials going forward. You'll use it in every subsequent operation. Tokens are good for three months.
- Copy the entire token, excluding the quotation marks.
 ✎ Note
If you receive a response saying your system is Inactive or Suspect, look at the system in the Create/Edit Databases menu in your PMA system. If the 'Disable Services' box is checked, un-check it. Services must be running in the system. Please note that this will activate the background services (like automatic order processing) in that system.
GET Reports
The next operation uses your credentials to figure out which reports you're allowed to access. Access to the reports is determined by the level of access associated with the Web Service user defined in PMA and linked to the token via the Login operation, above.
- Expand Reports.
- Click the api/reports link in the GET operation.
- The API only needs your token. Paste your token after 'bearer' in the Authorization parameter field.
- Click Try it Out.
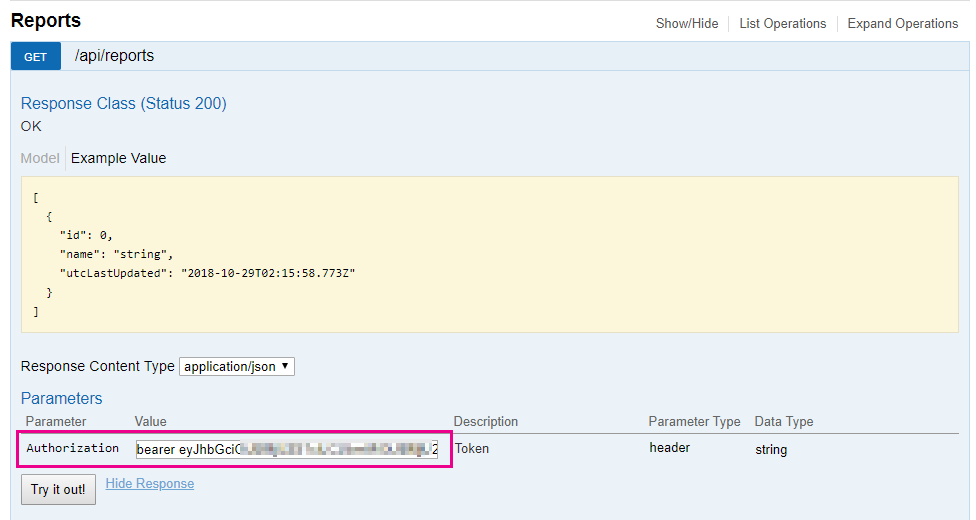
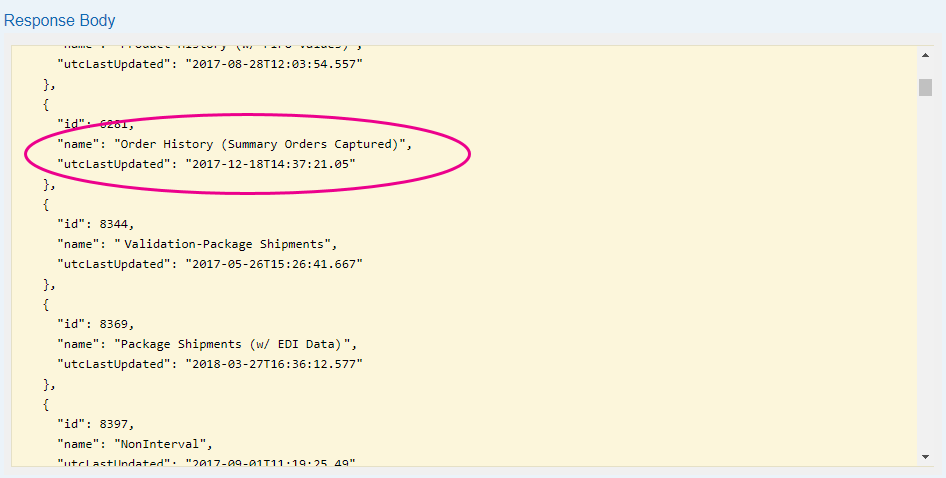
The response body should contain the names of whichever reports the web service user tied to that token can access. Get your report name here.
GET Report Details
The next operation lets you get the details about a specific report. The report details, columns, and filters are all returned in the response body.
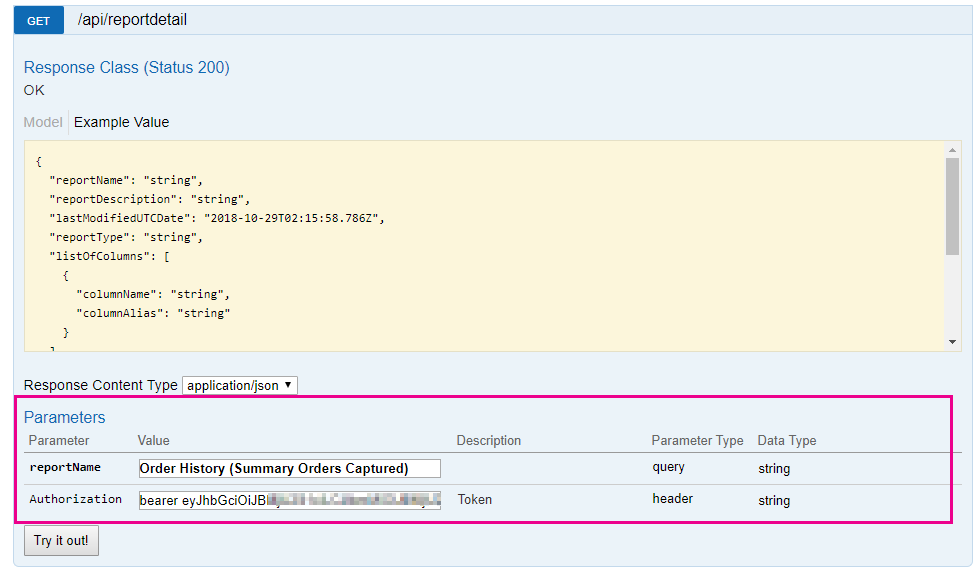
- Click /api/reportdetails. The operation expands.
- This operation is querying a report to get the details on that report. You'll need to tell it the report name and your Token. Enter the report name from the GET Reports operation response into the reportName parameter.
- Paste your token after 'bearer' in the Authorization parameter.
- Click Try it Out.
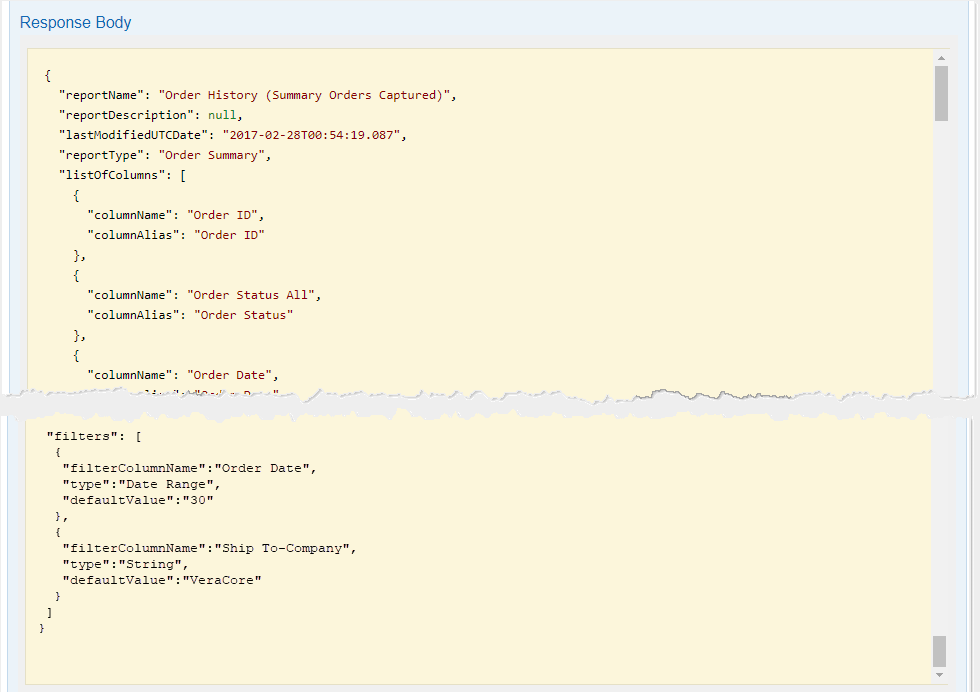
The response body should display the report details, followed by all report columns, and then the available data filters at the end. You'll use these filters when setting up the report task in the next operation.
In our example, there is a filter based on the Order Date and on the Ship To Company (all orders shipping to company "VeraCore".)
POST Report
This is the operation where you create the task of running the report. In this operation, you'll send the report name, report filters, and your token. The response will NOT be the report. The response will be the Id of the Task that is created to run the report.
- Click /api/reports beside the POST operation. The operation expands.
- The request box is empty. Click the yellow request example box to populate the working request box.
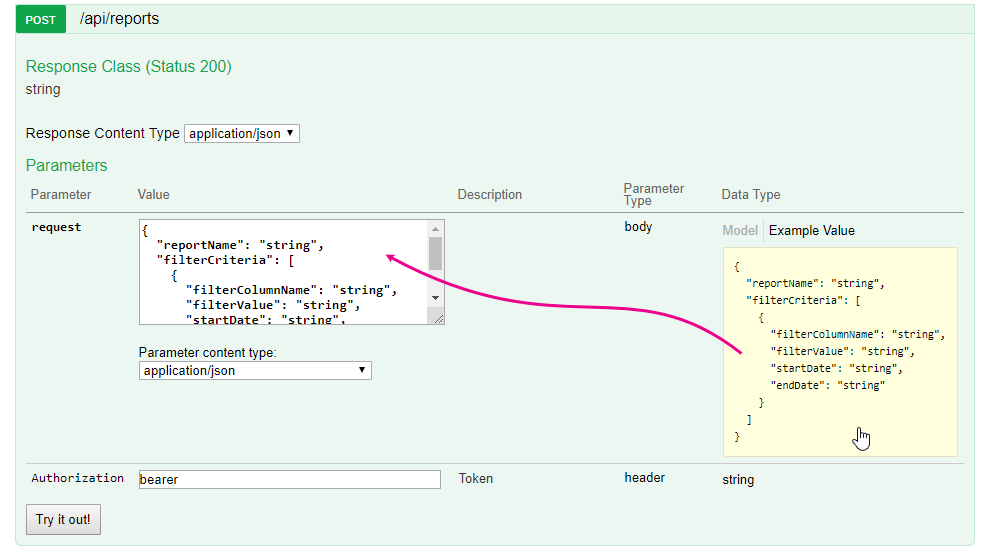
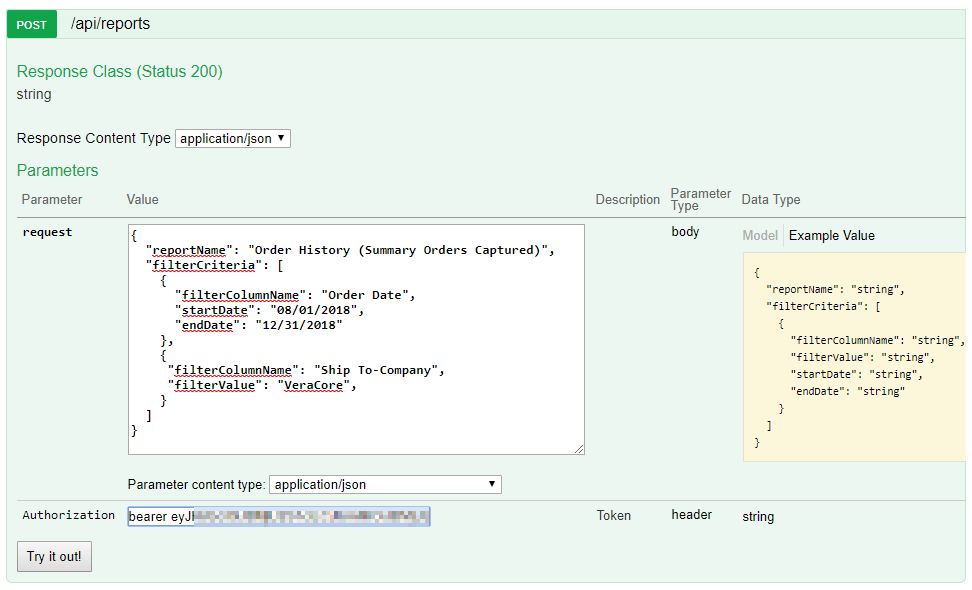
- Highlight and replace the string values with your actual parameter values. Note the yellow example value provides one filter criteria. Depending on your own filters, you will need to form your own filter parameter. See the example below. In it, our report filters on Order Date (8/1/2018 thru 12/31/2018) and Ship To Company (all shipping to the company "VeraCore".) In order to be used here, these filters must already exist in your Dynamic Report definition.
- Paste your token after 'bearer' in the Authorization parameter.
- Click "Try it Out!" The operation runs.
The response body does not return the report. It returns the Id of the task created to run the report.

We'll use this task Id going forward to check on the report's status. When it's done, we'll use this task Id to get the report results.
GET Task Status
In the last operation, you created a task of running the report. Setting up a task and referencing a task to run the report gives longer reports time to generate behind the scenes.
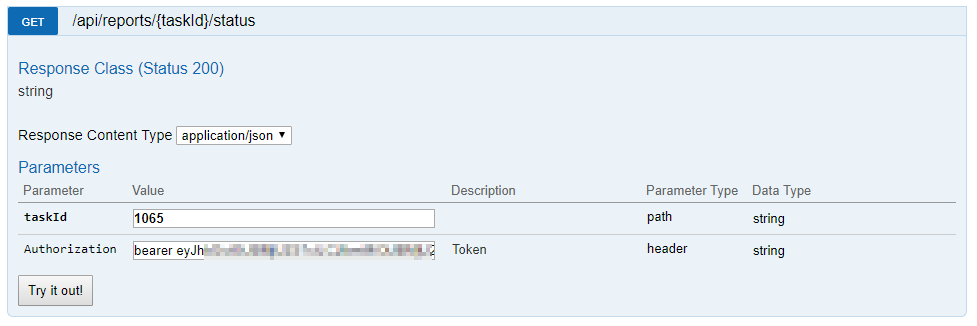
- Click /api/reports/{TaskId}/status beside the GET status operation. The operation expands.
- The only parameters here are the TaskId, which is included in the path, and the token in the authorization parameter. Fill in the task Id and paste your token after 'bearer'.
- Click "Try it Out!"
The response will provide the task status. Options are:
"Done" : The report is ready.
"Processing" : The task is still processing. Try back in a moment.
"Request too large" : The report exceeds 100 MB. Try the POST operation again with more restrictive filters to get a smaller report.
Ours is "Done". We can now run the operation to GET the report results.

GET Report
This is the operation where you get the report. You'll need the Task Id and your token again.
- Click /api/reports/{TaskId} beside the GET report operation. The operation expands.
- As with the previous operation, we only need the TaskId, which is in the path, and the token in the authorization parameter. Fill in the task Id and paste your token after 'bearer'.
- Click "Try it Out!"
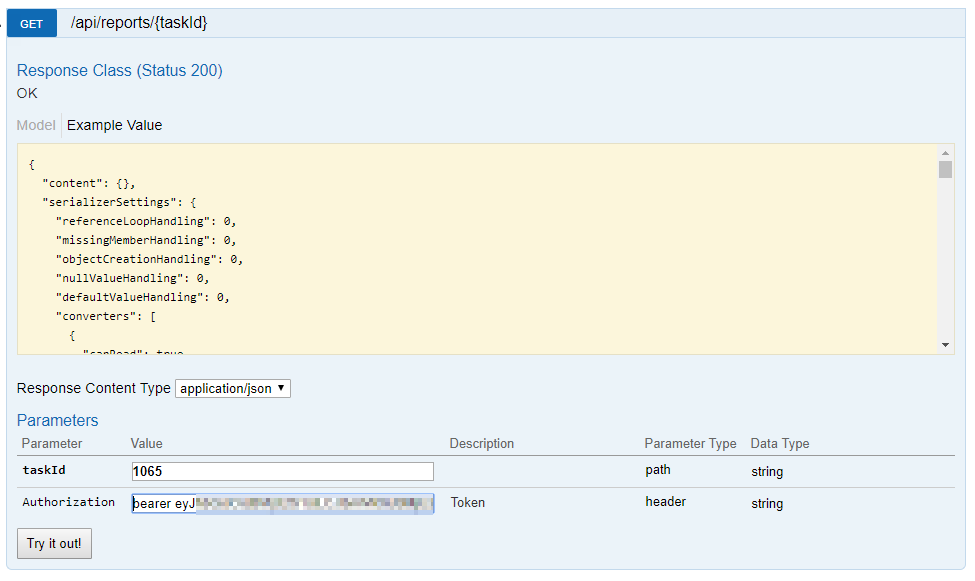
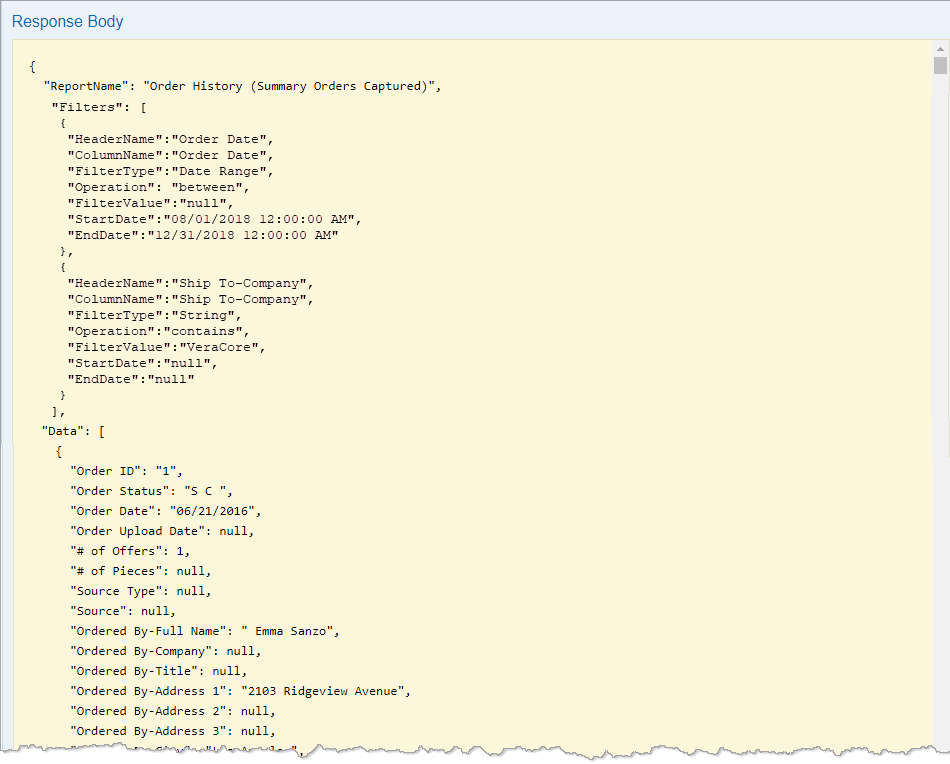
The response is the report itself.
GET Token
This last operation can be performed as needed to check the status of your Token.
- Click Token to expand and list the operations.
- Click /api/Token to expand the GET Token status operation. The operation expands.
- All you'll need is the token. Paste the token after 'bearer' in the Authorization parameter field.
- Click "Try it Out!"

The reponse is the token's status.

Recommended Reading
Dynamic ReportingCreate a Dynamic ReportSchedule Dynamic Reports to Run Automatically (Export Scheduler)Generate a Dynamic ReportCustomize the Layout of Dynamic Reporting ScreensDynamic Reporting API